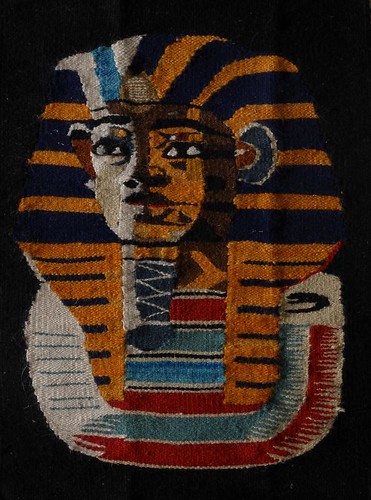
A simple photograph of a tapestry I got from Egypt last year.
The thing to notice is that the texture is perfectly shown, and you can tell exactly what kind of material it's made out of.
That was my goal - to reproduce it as closely as possible. The viewer should feel that they are looking at the actual object, or to put it another way... if they see the actual tapestry, they shouldn't be surprised at how it looks and displays.
Continue for the technical details ...
For this photograph, only one light was needed. Here's the set up diagram.
 | |||
| Lighting Diagram for tapestry shot |
The easy part is the camera position. Shooting straight-on gives the least distortion - and since this is a flat piece, you're not adding any extra perspective.
Lights and their Position
The light position depends on a few things - such as the texture and the reflectivity of the subject itself. If you read the links, and are more confused than not, don't worry.
Quickly:
For texture, I noted that the surface is bumpy, not smooth. A painting or photograph on paper would be smooth (not the best examples, but you get the point, right?)... the tapestry has small bumps where the fibers intertwine.
For reflectivity, it is dull, not shiny (or glossy). A framed piece of art with glass in the front, for instance, would have been shiny, and I've have to shoot it differently.
Placing the light at a shallow angle makes the light skim over the small ridges... the side of the small ridges towards the light are lit slightly brighter than the other sides. Because the ridges are small, they don't make noticeable shadows, but rather just emphasize the texture.
The other factor is the distance of the light from the subject. The inverse-square law needs to be considered. Again, simply, the closer the light is to the subject, the more difference in light there will be between the two edges (closer to and farther from the light) of the subject. This is because the closer the light is, the bigger the relative distance is of the two edges from the light.
Here's a quick example.
Assume we have a subject that is 1 foot wide. If the light is 1 foot away from the left side of the subject, the distance from the left side to the light is 1 foot (we just placed it there), and the distance from the right side to the light is 2 feet (1 foot from left side to the light + 1 foot wide subject).
This means that the left side will be illuminated 4 times as brightly as the right side. Twice the distance means 1/4th the light.
Now we move the light 9 feet away from the left side. The relative distance is much smaller between the sides. 9 feet and 10 feet. Now even though the actual illumination from the same-powered light is less brighter than before (some math can tell you how much), both sides (edges) are closer in their illumination to each other.
The relative distance is only 1/10 vs. 1/2 previously.
So, we went from a difference of 50% to a difference of 10%.
Quick note: I know the math isn't perfect - it's not meant to be. This is just to illustrate the effect of moving the light farther away.
I ended up placing the light approximately 10 feet away from the tapestry. If the tapestry was much wider, I may not have been able to place the light far enough away, and get "even" illumination, and would need to reach into my bag of tricks, and do some more magic. But it wasn't needed in this case.
Once you have the light and the camera positioned, just meter the subject, or chimp a few shots, take the final shot, and you're done.
My equipment for this photograph:
- Canon G12
- Elinchrom DLite4 (with softbox), triggered with Skyport
- Sekonic light meter
No comments:
Post a Comment